Kid-Friendly Watercolour Sunset Artwork Tutorial
Creating a sunset art piece for kids using liquid watercolors and animal silhouettes can be a fun and creative activity. Here's a step-by-step guide to help you achieve this.
Materials Needed
- Liquid Watercolors: Choose vibrant colors for the sunset (e.g., pink, orange, yellow)
- Watercolor Paper: Use high-quality paper suitable for liquid watercolors
- Silhouette Cutouts: Use cardstock or paper cutouts of animals (e.g., birds, deer)
- Paintbrushes: Various sizes for blending
- A Hair Dryer (optional): To speed up drying and blending
- Glue: For securing the silhouettes
Instructions
Step 1: Prepare the Background
- Wet the Paper: Lightly wet the entire paper with water.
- Paint the Sunset:
- Start with yellow at the top, gradually moving to orange, and finally pink towards the bottom.
- Use a large brush to create soft, blended strokes. Let the colors run and blend.
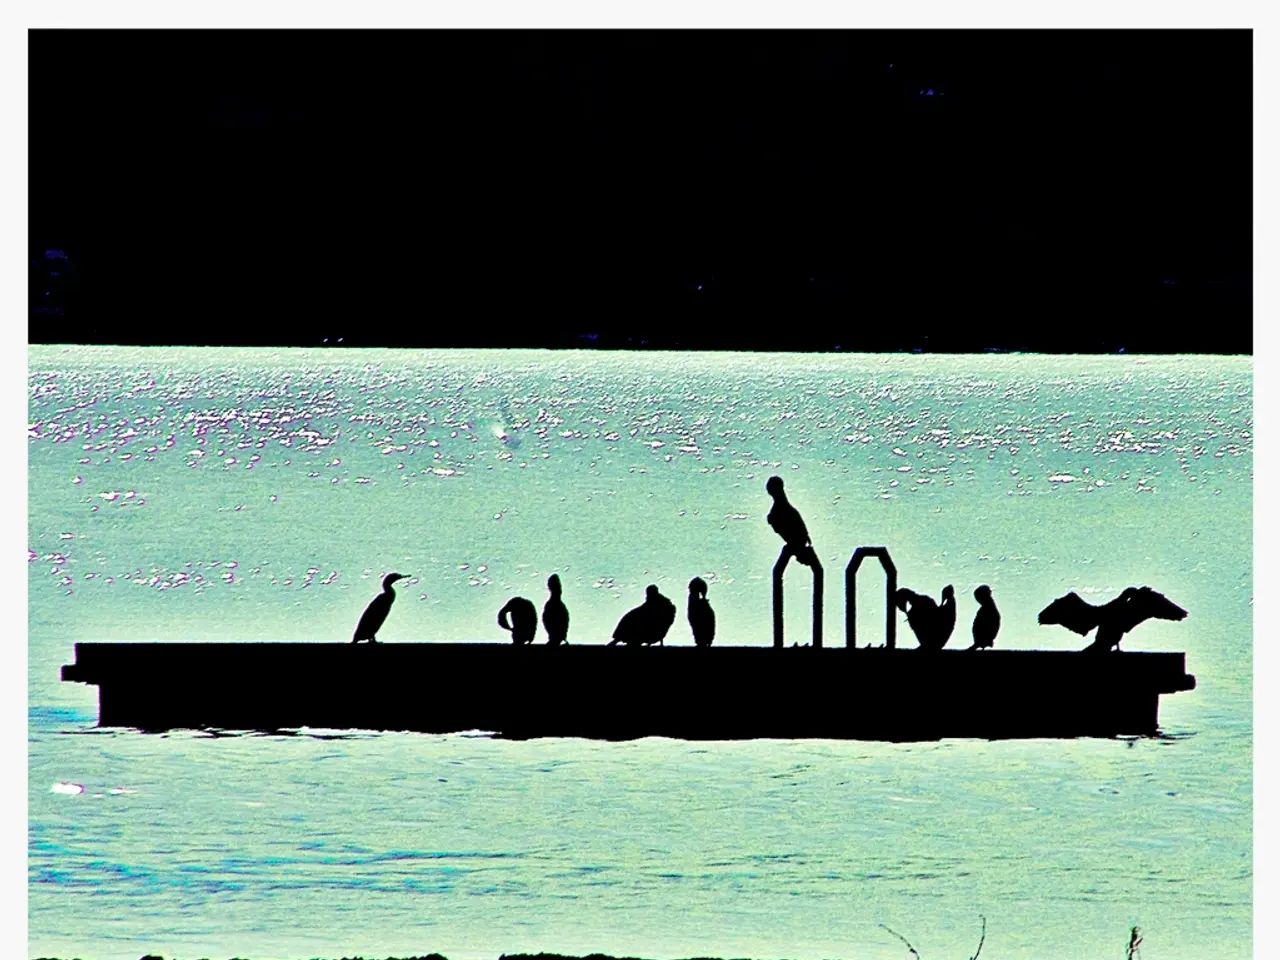
Step 2: Add Silhouettes
- Cut Out Animal Silhouettes: Use scissors or a craft knife to cut out animal shapes from black cardstock or dark-colored paper.
- Position the Silhouettes: Arrange the silhouettes across the painting, creating a composition that reflects the story's theme.
- Adhere the Silhouettes: Use glue to fix the silhouettes in place.
Step 3: Enhance the Painting (Optional)
- Add Clouds or Trees: Use a small brush to add cloud shapes or tree silhouettes if desired.
- Blend Colours: Use a hair dryer to speed up the drying process and blend colors further if needed.
Step 4: Final Touches
- Let it Dry: Allow the painting to fully dry.
- Frame or Display: Frame the artwork or display it as is.
Tips for Kids
- Experiment with Colors: Encourage kids to try different color combinations for their sunset.
- Get Creative with Silhouettes: Use various shapes and sizes of animals to create a dynamic scene.
- Have Fun: The process is as important as the final product, so enjoy the creativity together!
This project combines art, storytelling, and creativity, making it a delightful activity for kids.
For example, one child used silhouettes of an adult and baby elephant from clker.com. They cut a strip of black card for the ground and used precision scissors to carefully cut out the fiddly silhouettes. The finished result was a painting of two elephant silhouettes on a black background.
Alternatively, you can print the silhouettes onto white card and then trace them onto black card to save black ink. Parragon Books, who publish books like "Where You Go, I Go," can be found on their website, Facebook, Pinterest, or Twitter.
Engage in a creative home-and-garden project by embellishing your living space with a sunset art piece using the children's artwork. Paint and frame the artworks, then arrange them in a group to create a captivating wall display that reflects your family's lifestyle. To make it more personal, use silhouette cutouts of your family members or pets to add an extra touch of uniqueness.
